Friday, August 29, 2014

How and WHY update pfSense

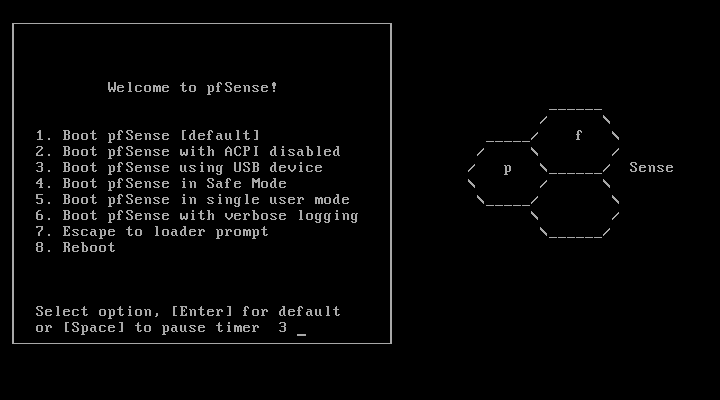
What is UPDATE or UPGRADE?
Why we need it?


"Updates are additions to software that can help prevent or fix problems, improve how your computer works, or enhance your computing experience."

"Upgrades introduce improvements and new features"

"Upgrades address/correct bugs encountered in prior versions."


and a lot more...


Now that you have an idea how important updates are, let's proceed to our next step...


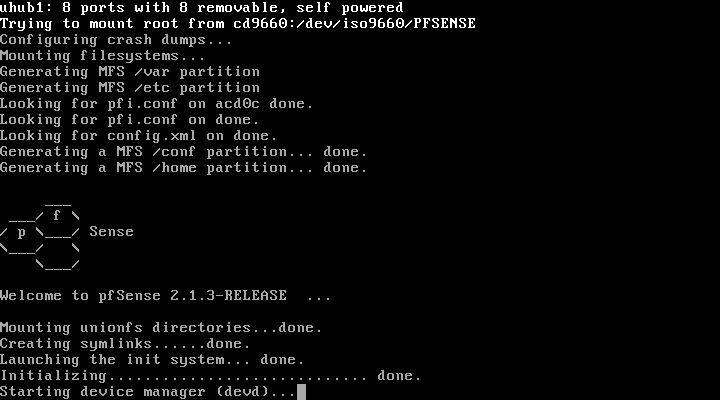
Prepare your pfSense for an update/upgrade....

Anything can happen,and for some reasons, your system may become unstable while updating or maybe after the update. So it is a good idea to back up first your configuration settings before doing the update. So that if the update goes wrong, you have a chance to go back to your previous stable state...

Here's how to back up your configuration:


1. Go to DIAGNOSTIC tab of your pfSenseGUI and click Backup/Restore.

    1.1. Diagnostics: Backup/restore page will open and you have now the option to Backup or Restore configuration

2. Click DOWNLOAD CONFIGURATION and save it on a secure location or directory.


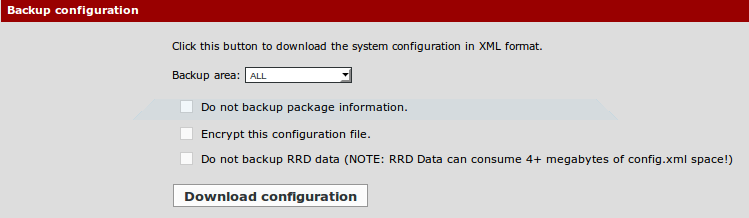
That's it. You now have a backup of your configuration. (Settings, Rules, Packages, more...)


Now
that we have the backup configuration, we can now proceed on updating our pfSense.
 

As of now 2.1.5 is the new and latest version. - "The 2.1.5 release follows shortly after 2.1.4 and is primarily a security release."  read more here

Here's how to update your pfSense:

1. Check the VERSION Status section of your pfSense on your dashboard.


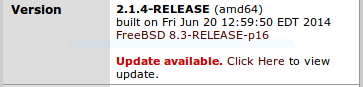
    1.1. You will see UPDATE AVAILABLE if there's an update available for you as you can see on the picture above. If your pfSense is updated, then it will tell you that "You are on the latest version."

    1.2. Click CLICK HERE to open the update page.


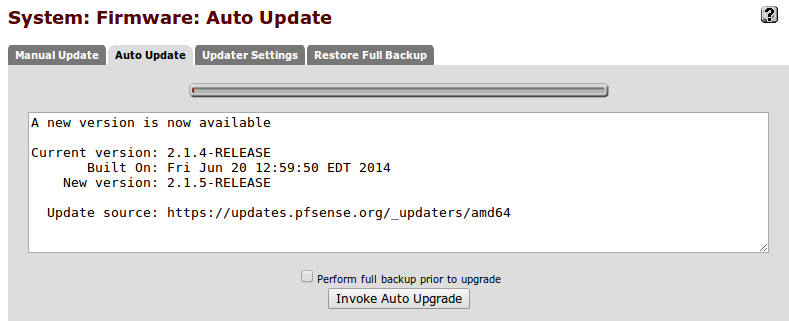
2. As you can see on the picture above, the current version that I have is 2.1.4 and the newer version is 2.1.5... Click INVOKE AUTO UPGRADE to update/upgrade pfSense.


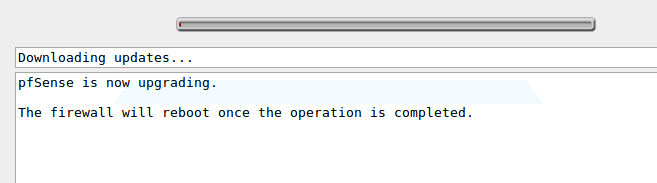
3. pfSense will download the updates now.


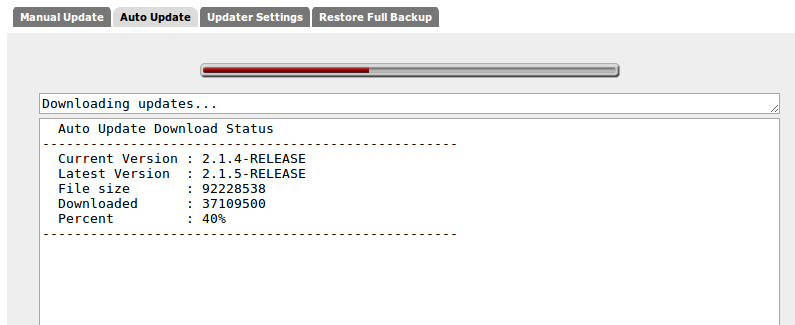
    3.1. Be patient. Wait. Your pfSense will reboot if it is done.


4. Once it is done, access your pfSense webgui again and check the VersionStatus. You must see 2.1.5 Release and "you are on the latest version"


-Done! :) Good job!


Note: If something is wrong about the new and updated version, you can go back to your previous configuration or setup using the backup that we did earlier... just upload the backup config file on Diagnostic Backup/Restore page.


Monday, August 18, 2014

filter web browsing

+   


How to filter web browsing with squid+squidguard

If you like to watch the video version of this tutorial, just click here.

1. Install Squid and SquidGuard
   1.1 On your pfSense WEBGui.. go to System >> Packages
   1.2 On Available Packages, scroll down and look for  SQUID
   1.3 click the + (install squid package) button at the right side to install Squid
   1.4 Click Confirm. pfsense will download and install squid package
   1.5 Repeat the steps , do the same for SquidGuard


2. Configure Squid
   2.1 Go to Services >> ProxyServer
   2.2 Select LAN >> Uncheck/disable "AllowUsersOnInterface"
   2.3 Enable/Check TransparentProxy and EnableLogging
   2.4 Save


3. Configure SquidGuard
   3.1 Go to Services >> ProxyFilter
   3.2 On GeneralSettings Tab >> Enable GUIlog >> Enable Log >> Check/Enable BlackList
   3.3 Copy and paste the link on BlackList URL
          http://www.shallalist.de/Downloads/shallalist.tar.gz
   3.4 SAVE
   3.5 Go to BlackList Tab >> Click DOWNLOAD


4. Configure the BlackList on CommonACL
   4.1  Go to CommonACL Tab
   4.2 You should see TargetRulesList click here
   4.3 Click on the "PLAY icon" in green color to bring down the rules or TargetCategories
   4.4 Scroll down, look for "Default access [all]" then make the Access = ALLOW
   4.5 Now select any category that you want to deny access ... let's block porn sites as example
   4.6 select " [blk_BL_porn]" then Access=DENY (note: this will deny access to pornsites, are you sure?? hehe :D )
   4.7 Enable LOG >> Enable "Do not allow IP-Addresses in URL"
   4.8 Save


5. Activate/Enable SquidGuard
   5.1 Go back to GeneralSettings Tab of ProxyFilter
   5.2 Check ENABLE
   5.3 Click APPY


6. Go to Services >> ProxyServer >> General Tab
   6.1 Check/Enable "Allow users on interface"
   6.2 Save


DONE! 


NOTE: Don't forget to click SAVE then APPLY SETTINGS everytime you make changes..

"After changing configuration squidGuard you must apply all changes"


If you like to watch the video version of this tutorial, just click here.Thanks!

more video tutorials here.

block HTTPS websites like facebook

How to block  HTTPS websites (e.g. Facebook) w/ pfSense
I'll block Facebook website as example ( https )

You can watch the video version of this tutorial here.


To block HTTPS websites like FACEBOOK , you need to .. .. .

1. PING facebook website and get the IP .


Try to PING www.facebook.com / fb.com / facebook.com .... it will give different results depending on your location. . . take note of the REPLY FROM ip ...  on the picture above its says REPLY FROM 31.13.68.49 and REPLY FROM 173.252.110.27 .....

DO the above instruction many times... yes... repeat it a lot to make sure that you'll get all the IPs possible... be patient ok?

You can try different ways and method, just keep in mind that your target at this point is to GET ALL POSSIBLE IPs of Facebook on your location.


2. Create an ALIAS with FB IPs on it

     --- On your pfSense WebGUI, go to FIREWALL >> ALIASES
     --- Create new alias. Give it a name(FBblock) and description
     --- Type is NETWORKs
     --- Enter the facebook IPs that you have from STEP 1 above
     --- SAVE >> APPLY SETTINGS


3. Make a LAN RULE that will block the IPs on your Alias

  --- Go to FIREWALL >> RULES >> CREATE new rule
  --- Action = BLOCK
  --- Interface = LAN
  --- tcp/ip version = IPV4
  --- Protocol = TCP/UDP
  --- Destination =
                         type: SingleHost or Alias 
                         Address: FBblock (Alias name that you created on Step 2. )
  --- Save . Apply settings


That's it! As easy as that! You are done. FACEBOOK website should be inaccessible or blocked by now, even the HTTPS one.
 I hope it works on you ;)


Dont forget to SAVE or APPLY SETTINGS every time you make changes. Sometimes you need also to reboot your pfSense for the changes to take effect. 

.
.
"hey WAIT! HOW CAN I MAKE MYSELF ACCESS FACEBOOK AND OTHERS ARE BLOCKED??!"
Maybe that's your next question... Am I right? or correct? :D ;)


If you want your PC and friends pc to bypass the facebook block rule.. you need to...

4. Create new alias with the IPs of "GoodPCs" (selected PCs to bypass the block rule)

  --- Create new Alias, give it a name and description
  --- Type = HOST
  --- Add new host and enter the IPs of your "GoodPcs"
  --- Save, Apply Changes


5. Go to FIREWALL >>RULES and edit the LAN rule to block FB that you created earlier on step 3 above...

  --- just add on SOURCE = Allow_this_IP (the allias name you created on step 4)
  --- check NOT . don't fail on this. go check not (use this option to invert the sense of the match)
  --- That's it. Save. Apply changes. reboot if needed.


You should see like this on your RULE > LAN 


"GoodPCs" or the selected IPs that you define on your step4 alias should be able to access facebook website now. 


Does it work? Let me know... 
Use the comment box below. Thanks 


next:  How to filter web browsing (block PornSites)


UPDATE: HOW to BLOCK YOUTUBE
(new)

Configure pfSense GUI

Install pfSense 2.1.3 part two 
Configure pfSense via WEB GUI


CLICK HERE to WATCH the Video Version of this Tutorial

If you missed the first part (how to install pfSense) just click here


1. Configure you desktop network. Change IP to 192.168.1.7 or 192.168.1.***


or just enable DHCP on your desktop


2. Try to PING your pfSense IP . You should get a reply to continue. 


If you get REQUEST TIME OUT, then you should check your Network settings or your IP.


3.Open your Web browser (IE , Chrome , Firefox, etc) and type your pfSense LAN IP on your browser address bar and hit enter. For this example, my pfSense LAN ip is 192.168.1.1.


4.ClickCONTINUE to this website. It’s ok and normal.


5. Next is you have to log in. By default, the username is admin and the password is pfsense. You can change that later.


6. Just click NEXT. 


7.Provide a hostname and domain. Click next.


 8. Select your Timezone


9. Leave the default settings here (DHCP). Click next


10. Leave the default settings here . Click next.


11. Provide a strong password. This will change the default admin password


12. Click RELOAD


13. Wait.. wait.. wait... 


14. Continue to WebConfigurator


15. You are done and will be directed to the dashboard


16. Go to Diagnostic tab. Reboot.


17. Confirm the reboot. Click YES


18. DONE! Good job!


Install pfSense

How-to Install pfSense


CLICK HERE to WATCH the Video Version of this Tutorial


-- Download the liveCD pfSense Installer here.

-- When download is finished, burn the pfSense Installer .

1. Boot from your pfSense installer.


2. Select OPTION 1.


Installer is loading now... wait....


3.Press " I " here to launch the Installer. Press ' I ' on your keyboard before Time (in seconds) runs out.


4. Accept these settings.


5. Select QUICK/EASY Install


6. OK


7. Wait . ..  . . .


8. Select Standard Kernel


9. Wait..... wait..... Reboot.


10. After rebooting, unload/remove the pfSense Installer from your cd/dvd drive.


11. Select OPTION 1 [Boot pfSense]again .


12. Now you need to configure network interfaces. I have 2 network interface installed for this setup. pfSense recognized it as em0 and em1. 


13. Say NO. just type n here and hit enter.


14. Enter the WAN interface name. Note the interface name that pfSense recognized in step 12. It's em0 and em1. pfSense may recognized it as fxp0 and fxp1 depending on your machine setup.


I'll type em0 as my WAN interface name here. 


15. Enter LAN interface name. My LAN interface name should be em1.


16. If you have more than 2 Network interface, type the 3rd name here.. if none, just hit enter to continue.


17. Review and confirm if all is correct then type Y to proceed.


18. Wait ... wait ....


19. Done. pfSense 2.1.3 installation is successful. :)


WAN em0 192.168.200.211    = IP from your ISP

LAN  em1 192.168.1.1            = Default IP of every new install pfSense. (you can change that)


20. Now let's configure our fresh install pfSense via Web Interface. 

-----You can leave your pfSense box now and go to your desktop computer.
-----Configure your desktop LAN settings, it should be in the same network of your pfSense to access the pfSenseWebGUI.
[your desktop ip should be like 192.168.1.2 or 192.168.1.**/24]


21. Note your pfSense LAN IP . For this set up it's 192.168.1.1. You need to remember that for the next tutorial.

Install pfSense part two : Configure pfSense via WEB GUI